Anaglyph Compositing
iaian7 » code » quartz John Einselen, 23.03.10Earlier this year I was working on some interactive demos at Vectorform that needed stereoscopic delivery. With Avatar, Up, and many other stereo movies being released, requests for 3D imagery were proliferating quickly, and I needed to develop a pipeline that could quickly and reliably deliver stereoscopic imagery for home, mobile, and specialised device delivery. Realtime processing in Apple’s Quartz Composer made it easy to quickly mock up and revise my compositing techniques, setting up compositing rules that were later ported into After Effects and Photoshop tutorials, and in-house plugins for After Effects, Final Cut Pro, and Motion via FxFactory Pro.
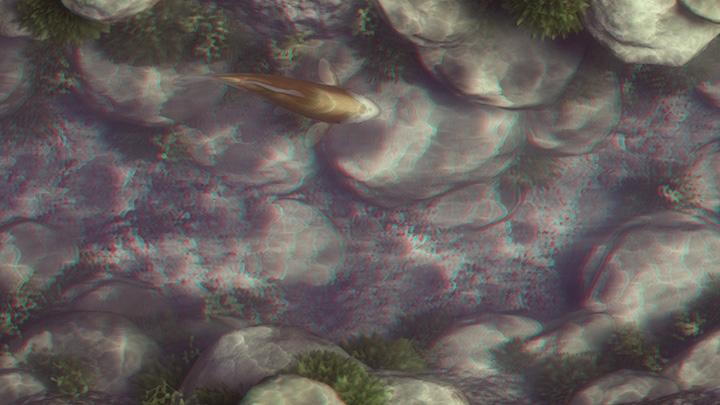
Stereo imagery
You’ve got to start with good left and right images, or the compositing just isn’t going to fly. Most of my work has been in Lightwave (with a hybrid convergent-parallel camera system), but properly aligned photographic sources are good too.

Admittedly, Quartz Composer is rarely used for production render pipelines; if you’re developing realtime 3D though, try out Kineme GL Tools. This free patch lets you render enclosed elements for both left and right views, providing perfect inputs for the following Core Image Filter patches.
Anachrome
Red/cyan glasses are the most popular, having enjoyed widespread use for decades. Using red wavelengths for the left eye, and green+blue for the right, we can deliver separate images to each eye while creating the impression of “full colour” anaglyphs by weighting the RGB channels. The left image will be converted to (essentially) black and white, weighted slightly towards the original image’s red channel, while the right image will have a little bit of the red channel mixed in to the blue and green channels. The following walks us through the basic concepts at play.
Red channel
kernel vec4 Anachrome(sampler Left, sampler Right)
{
	vec4 accum;
	vec4 image = (1.0,1.0,1.0,1.0);
	float Contrast = 0.9;
	float l1 = Contrast*0.45;
	float l2 = (1.0-l1)*0.5;

	accum = sample(Left, samplerCoord(Left))*vec4(l1,l2,l2,1.0);
	image.r = accum.r+accum.g+accum.b;
The Contrast variable lets us adjust the apparent colour saturation (based on the contrast between channels) to adjust and tune the composited effect. This is designed to limit retinal rivalry, where extreme value differences cause irreconcilable anachronisms between the left and right eye, while still giving the impression of colours despite limited wavelengths reaching the left and right eyes. Imagery heavy in saturated colours may require lower contrast settings, while images with more subtle coloration may look better with more. It’s all relative, but the final code posted at the end of the article does include basic limits on how far it’ll go – extreme settings beyond 0.5 or 1.0 will usually produce unusable results.
Green channel
	float r1 = Contrast;
	float r2 = 1.0-r1;

	accum = sample(Right, samplerCoord(Right))*vec4(r2,r1,0.0,1.0);
	image.g = accum.r+accum.g+accum.b;
In this case we’ll want the same contrast value to determine the mix between green and red channels (because the cyan right eye receives both green and blue channels, we don’t need to include any blue here).
Blue channel
	float r1 = Contrast;
	float r2 = 1.0-r1;

	accum = sample(Right, samplerCoord(Right))*vec4(r2,r1,0.0,1.0);
	image.b = accum.r+accum.g+accum.b;
Almost exactly like the green channel, but swapping the green channel for the blue channel. Again, we don’t need any green mixed in since it’s already seen by the right eye.
Deghosting and final processing
Because 3D glasses aren’t pure wavelength filters, the red and green/blue split is never exact, resulting in ghosting. To compensate for this, we’ll subtract the values seen by the left eye (the red channel) from the values seen by the right eye (blue and green channels), and vise-versa.
	accum = image;
	float Deghost = 0.06;
	image.r = (accum.r+(accum.r*(Deghost))+(accum.g*(Deghost*-0.5))+(accum.b*(Deghost*-0.5)));
	image.g = (accum.g+(accum.r*(Deghost*-0.25))+(accum.g*(Deghost*0.5))+(accum.b*(Deghost*-0.25)));
	image.b = (accum.b+(accum.r*(Deghost*-0.25))+(accum.g*(Deghost*-0.25))+(accum.b*(Deghost*0.5)));
	return image;
While it’s complicated looking, all this code does is reset our source variable (accum) with the final render (image) and recompute the final render with deghosting via channel subtraction. The final output should be easily viewable by a wide range of Anachrome glasses!
/*
//	Core Image filter for anaglyph compositing
//	Anachrome (red/cyan glasses)
//	John Einselen – iaian7.com – vectorform.com
*/

	kernel vec4 Anachrome(sampler Left, sampler Right, float Contrast, float Deghost, vec2 Stereo)
{
	Stereo = Stereo * 50.0;
	vec4 accum;
	vec4 image = (1.0,1.0,1.0,1.0);
	Contrast = (Contrast*0.5)+0.5;
	float l1 = Contrast*0.45;
	float l2 = (1.0-l1)*0.5;
	float r1 = Contrast;
	float r2 = 1.0-r1;
	float deghost = Deghost*0.1;

	accum = clamp(sample(Left, samplerCoord(Left)+Stereo)*vec4(l1,l2,l2,1.0),0.0,1.0);
	image.r = pow(accum.r+accum.g+accum.b, 1.00);
	image.a = accum.a;

	accum = clamp(sample(Right, samplerCoord(Right)-Stereo)*vec4(r2,r1,0.0,1.0),0.0,1.0);
	image.g = pow(accum.r+accum.g+accum.b, 1.15);
	image.a = image.a+accum.a;

	accum = clamp(sample(Right, samplerCoord(Right)-Stereo)*vec4(r2,0.0,r1,1.0),0.0,1.0);
	image.b = pow(accum.r+accum.g+accum.b, 1.15);
	image.a = (image.a+accum.a)/3.0;

	accum = image;
	image.r = (accum.r+(accum.r*(deghost))+(accum.g*(deghost*-0.5))+(accum.b*(deghost*-0.5)));
	image.g = (accum.g+(accum.r*(deghost*-0.25))+(accum.g*(deghost*0.5))+(accum.b*(deghost*-0.25)));
	image.b = (accum.b+(accum.r*(deghost*-0.25))+(accum.g*(deghost*-0.25))+(accum.b*(deghost*0.5)));
	return image;
}
This is a bit more fleshed out than the examples above, with Contrast, Deghost, and Stereo variables normalised for 0.0-1.0 inputs. Clamp and Pow functions are included to prevent problematic image value clipping and optimise the brightness of the output image. The Stereo setting allows for small alignment adjustments to the images, just in case your footage needs further finessing to get a good composite (when compositing 3D or Kineme GL output, this can be left at 0,0).
Triochrome
While the concepts are the same, we’ll be flipping around some of the numbers. Triochrome glasses use green for the left eye and magenta for the right (red and blue channels combined). This technique better balances our typical visual sensitivity towards green with the combined brightness of red and blue channels, and has been gaining popularity in recent years, with many DVD releases featuring Triochrome delivery.

/*
//	Core Image filter for anaglyph compositing
//	Trioscopic (green/magenta glasses)
//	John Einselen - iaian7.com - vectorform.com
*/

kernel vec4 Trioscopic(sampler Left, sampler Right, float Contrast, float Deghost, vec2 Stereo)
{
	Stereo = Stereo * 50.0;
	vec4 accum;
	vec4 image = (1.0,1.0,1.0,1.0);
	Contrast = (Contrast*0.5)+0.5;
	float l1 = Contrast*0.45;
	float l2 = (1.0-l1)*0.5;
	float r1 = Contrast*0.8;
	float r2 = 1.0-r1;
	float deghost = Deghost*0.275;

	accum = clamp(sample(Right, samplerCoord(Right)-Stereo)*vec4(r1,r2,0.0,1.0),0.0,1.0);
	image.r = pow(accum.r+accum.g+accum.b, 1.15);
	image.a = accum.a;

	accum = clamp(sample(Left, samplerCoord(Left)+Stereo)*vec4(l2,l1,l2,1.0),0.0,1.0);
	image.g = pow(accum.r+accum.g+accum.b, 1.05);
	image.a = image.a+accum.a;

	accum = clamp(sample(Right, samplerCoord(Right)-Stereo)*vec4(0.0,r2,r1,1.0),0.0,1.0);
	image.b = pow(accum.r+accum.g+accum.b, 1.15);
	image.a = (image.a+accum.a)/3.0;

	accum = image;
	image.r = (accum.r+(accum.r*(deghost*0.5))+(accum.g*(deghost*-0.25))+(accum.b*(deghost*-0.25)));
	image.g = (accum.g+(accum.r*(deghost*-0.5))+(accum.g*(deghost*0.25))+(accum.b*(deghost*-0.5)));
	image.b = (accum.b+(accum.r*(deghost*-0.25))+(accum.g*(deghost*-0.25))+(accum.b*(deghost*0.5)));
	return image;
}
You’ll notice not only have colour values been reworked to produce a green/magenta image, but the Pow values have changed slightly and deghosting is more agressive. Again, this should give good results for a wide variety of glasses, and is easily customised for different scenes by adjusting the Contrast and Deghost variables.
ColorCode
Although used for the 2009 Super Bowl in the US and an episode of Chuck (among a few other events), ColorCode hasn’t enjoyed the same popularity as other methods. Possibly because the blue channel is darker than any other, and leaving it by it’s lonesome to handle the right eye is just overly taxing, or maybe just licensing concerns (of which I’m not fammiliar myself)

/*
//	Core Image filter for anaglyph compositing
//	ColorCode (blue/amber glasses)
//	John Einselen - iaian7.com - vectorform.com
*/

float contrast(float img, float cst)
{
	float img1 = pow(img,cst);
	float img2 = 1.0-pow(1.0-img,cst);
	return mix(img1,img2,img);
}

kernel vec4 ColorCode(sampler Left, sampler Right, float Contrast, float Deghost, vec2 Stereo)
{
	Stereo = Stereo * 50.0;
	vec4 accum;
	vec4 image = (1.0,1.0,1.0,1.0);
	Contrast = (Contrast*0.5)+0.5;
	float l1 = Contrast*0.45;
	float l2 = (1.0-l1)*0.5;
	float r1 = Contrast;
	float r2 = 1.0-r1;
	float deghost = Deghost*0.275;

	accum = clamp(sample(Left, samplerCoord(Left)-Stereo)*vec4(r1,0.0,r2,1.0),0.0,1.0);
	image.r = pow(accum.r+accum.g+accum.b, 1.05);
	image.a = accum.a;

	accum = clamp(sample(Left, samplerCoord(Left)-Stereo)*vec4(0.0,r1,r2,1.0),0.0,1.0);
	image.g = pow(accum.r+accum.g+accum.b, 1.10);
	image.a = image.a+accum.a;

	accum = clamp(sample(Right, samplerCoord(Right)+Stereo)*vec4(l2,l2,l1,1.0),0.0,1.0);
	image.b = pow(accum.r+accum.g+accum.b, 1.0);
	image.b = contrast(image.b,(Deghost*0.15)+1.0);
	image.a = (image.a+accum.a)/3.0;

	accum = image;
	image.r = (accum.r+(accum.r*(deghost*1.5))+(accum.g*(deghost*-0.75))+(accum.b*(deghost*-0.75)));
	image.g = (accum.g+(accum.r*(deghost*-0.75))+(accum.g*(deghost*1.5))+(accum.b*(deghost*-0.75)));
	image.b = (accum.b+(accum.r*(deghost*-1.5))+(accum.g*(deghost*-1.5))+(accum.b*(deghost*3.0)));
	return clamp(image,0.0,1.0);
}
Download
Beyond Quartz
Beside realtime graphics, screensavers, and iSight image filters in OSX, Quartz Composer files can be used in quite a few OSX applications as well. FxFactory Pro not only includes a large number of basic effects itself, but allows you to create your own using Quartz Composer. The resulting hardware-accelerated effects are available for use in Adobe After Effects, Apple Final Cut Pro, and Apple Motion.
Adobe and After Effects are either registered trademarks or trademarks of Adobe Systems Incorporated in the United States and/or other countries.
Apple, Final Cut, Motion, and Quartz Composer are either registered trademarks or trademarks of Apple Incorporated in the United States and/or other countries.
Newtek and Lightwave 3D are either registered trademarks or trademarks of Newtek Incorporated in the United States and/or other countries.
Noise Industries and FxFactory are either registered trademarks or trademarks of Noise Industries LLC in the United States and/or other countries.
 mediaboxAdvanced