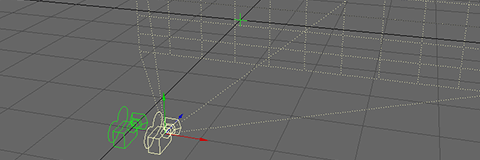
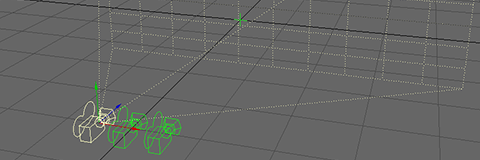
Stereoscopic Cameras
iaian7 » tutorials » lightwave John Einselen, 19.03.10 (updated 28.11.11)2011 Update: a custom camera setup is no longer required, as Newtek included a native stereoscopic camera with full convergence and perspective control in Lightwave 10.
Vectorform is always working on the latest tech, be it unreleased hardware or the most popular multitouch platforms from Microsoft, Apple, 3M, HP, and others. We work with some of the top players in the industry, and earlier this year we got to develop stereoscopic demos on the Microsoft Surface. In preparation for productions like this, I worked on pipeline solutions for developing, creating, and finishing stereo imagery.
There are of course multiple ways to deliver a stereoscopic experience; linear and circular polarised glasses paired with filtered projection (IMAX and Disney RealD), lenticular or masked parallax displays (such as Sharp 3D or the Nintendo 3Ds), and many more, including the easiest and oldest — anaglyphic. While I’ll discuss anaglyphic compositing in some upcoming articles, this tutorial covers some of the actual camera setups and rendering tricks needed to create stereoscopic imagery in the first place. Generating content for stereoscopy (left and right sides) is universal, regardless of delivery mechanism, so this tutorial should be suitable for any system you’re working with.
Two schools of thought
When shooting Avatar, James Cameron used converging cameras. This is where the left and right cameras are mounted side by side, but rotated towards each other to aim at a specific z-axis location. Advantages include immediate directorial control over where the image lies on screen; the apparent “base” of the stereoscopic effect, where an item is balanced between jumping out of the screen at the viewer, and receding into the distance. The disadvantage is large amounts of perspective and barrel distortion, which must be fixed in post before being usable on screen.
Pixar took the opposite approach in Up – using (in their case, virtual) cameras mounted exactly parallel to each other. This results in precise perspective and no distortion, albeit with the need for post render adjustments to place the stereoscopic base (though I’m not actually sure how Pixar handle this, they may have done it in-render as well). This was paired with floating screen frames and other techniques to precisely tune the 3D effect seen in theatres.
Lightwave camera rig
While Lightwave offers a built-in stereoscopic camera, it doesn’t support features like photo real motion blur, nor does it let us tweak the details of the stereo base or convergence. The good news is that we can build a far more advanced stereo camera rig using cameras, parenting, and expressions.
 To start off with lets create a Camera Main, and attach it to a null. Every artist has his or her preferred camera rig; this is the basic one I use for most setups, even if it’s just a 3/4 shot of a digital illustration. Creating a main camera also allows composition and animation from a neutral point, instead of favouring one eye over the other.
Stereo cameras
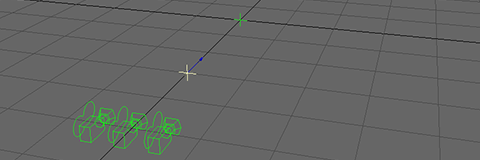
Clone the main camera twice, and rename as Camera Right and Camera Left. Parent them to the main camera, and shift Camera Right on the X axis. Depending on your scene scale and desired depth effect, this could be anywhere between 10mm and 1m, or more.
 Select Camera Left and open the Motion panel. Add Follower, select Camera Right, and set all but the position channels to
 none. Change the X axis multiplier to -1 and click Continue to apply.
You should now have two cameras on either side of your main camera, perfectly mirroring each other.
Hybrid Convergent-Parallel system
This is where the magic starts to happen!
 Add a second null, name it Focal Null, and parent it to Camera Main as well. Set X and Y axis to 0, and uncheck them by clicking on the axis label. No need for unnecessary axis handles cluttering up the viewports.
If you try aiming the left and right cameras at this null, you’ll notice severe distortion when viewed in stereo, but leaving the cameras parallel will leave you without control over depth convergence. This is why we want a hybrid system, and it’s also why Lightwave is perfect for the job!
 Select Camera Right and change the camera type from
 Perspective Camera to Shift Camera. You’ll see a new window pop up with extended options. Uncheck use camera pitch and click the e button next to horizontal shift, then do the same for Camera Left.
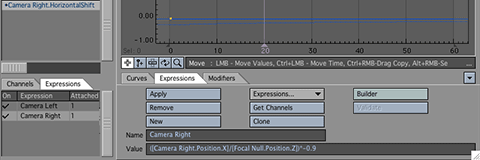
In the opened Graph editor, switch to the Expressions tab, and click New. Enter Camera Left as the name, and the following expression as the value:
([Camera Right.Position.X]/[Focal Null.Position.Z])*0.9
Click Apply to attach it to the Camera Left Horizontal Shift property, then switch back to Camera Right and repeat with a new expression, using this string:
([Camera Right.Position.X]/[Focal Null.Position.Z])*-0.9
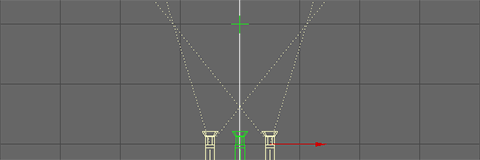
If you select both cameras, you should see the viewport lines intersecting with each other at the same z-depth as your focal null. Depending on the rendered resolution, you may need to adjust the multiplier at the end of the expression to achieve this. 0.9 is the magic number for HD resolutions (16×9 ratio), but you can also add a few expressions to do this dynamically, along with adding support for animated zooms.
A fully dynamic rig, however, requires the use of LScript format code to access non-animated variables, which doesn’t support objects containing spaces. Any item names with spaces will have to be renamed without them.
Create an expression named “Zoom” and attach it to the focal length channel of both left and right cameras, using the following code:
CameraMain.zoomfactor(Time)
Create two more expressions titled “Aspet” and “Position”, using the following lines:
Scene.width/Scene.height
[CameraRight.Position.X]/[FocalNull.Position.Z]
This calculates both the distance scaler and the rendered aspect ratio. Using these as sub-expressions, we can simplify the left and right expressions like this:
[Position]*([Zoom]/[Aspect]*0.5)
[Position]*([Zoom]/[Aspect]*-0.5)
This convergence of the camera views indicates the effective zero point of the depth effect – the point at which objects will appear to be at the same level as the screen. It’s the best of both worlds, giving full control over stereo convergence while avoiding the perspective distortion of typical converging cameras. Careful use of this setup can result in 3D renders needing very little adjustment in post, with easily customised, even animated, depth controls in Lightwave.
Download
Download the final Lightwave scene files from the official Vectorform blog post.
The Art of Stereo
There are countless nuances when it comes to rendering for stereoscopic presentation, most of which I’m still learning myself. As a start though, here are a few basics…
Poking the viewer in the eye is not a classy thing to do. Keep it subtle, logical, and always subservient to the story. Learn a lesson from Pixar; if the 3D effect is ever distracting or detracting from the emotional tone, pull the left and right cameras closer together to flatten out the scene. If you get the chance to watch Up again in 3D, keep an eye on the visual depth of the scene. It’s almost always inversely proportional to the emotional depth.
Keep elements within an easily focusable area. Too much difference between between foreground and background elements, and it’s painful to watch. Too little, and there’s no reason to see it in 3D. Set the distance between left and right cameras (the stereo base) to a width that balances between a realistic, pleasant, and appropriately dramatic feeling of depth. Filmmakers will of course experiment with depth like Hitchcock experimented with the dolly-zoom combination; creatively changing the perspective and depth within a scene to achieve dizzying effects. If you are that filmmaker, please don’t overdo it!
Blurry or nebulous objects can destroy depth. Not necessarily a bad thing in all circumstances; Avatar used plenty of depth of field in some shots, and scenes still felt nicely dimensional. But blurry items, and motion blur in particular, make it much harder for the brain to process apparent depth. Most stereoscopic displays are already taxing the visual system somewhat (especially shutter and anaglyphic glasses); there’s no need to make it even harder. While you may have a 180º shutter on your main camera (50% motion blur in Lightwave), the left and right cameras may need to use half that, if not less, depending on the movement within the scene and the style requested by the director(s).
Like pretty much any other artistic endeavour, we’re here to manipulate and even outright trick the brain. Keep it sane, painless, and most of all, fun!
Compositing and Delivery
Finishing depends entirely upon the delivery mechanism; analgyphic (anachrome, triochrome, colorcode), polarisation (IMAX linear, RealD circular), lenticular (Sharp 3D), and many others.
Discuss
Visit the Newtek forum or SpinQuad to comment and discuss the tutorial.
You can also stop by the thread started by Jrandom on the Newtek Forums, which contains more advanced and specific math formulas.
Newtek and Lightwave 3D are either registered trademarks or trademarks of Newtek Incorporated in the United States and/or other countries.
Adobe, Photoshop, and After Effects are either registered trademarks or trademarks of Adobe Systems Incorporated in the United States and/or other countries.


