Soap Foam Surfacing
iaian7 » tutorials » lightwave John Einselen, 13.09.12 (updated 17.09.12)Bubbles are just plain fun, and after reading a post by Milivoj Popovic on the Newtek Forum, I was inspired to try some experiments myself! The self-imposed guidelines were simple; using a single simple surface, texture it procedurally in such a way as to evoke both depth and surface detail, emulating the undulating colours, specular complexity, and volumetric look of the soap foam you might find in a bubble bath or kitchen sink. You can check out some of the original development process test renders on youtube.
To get started, you’ll want a recent version of Lightwave (10 or 11 should suffice), and the free DPkit nodes. Sample project files are available at the end of the article.
Textural basis
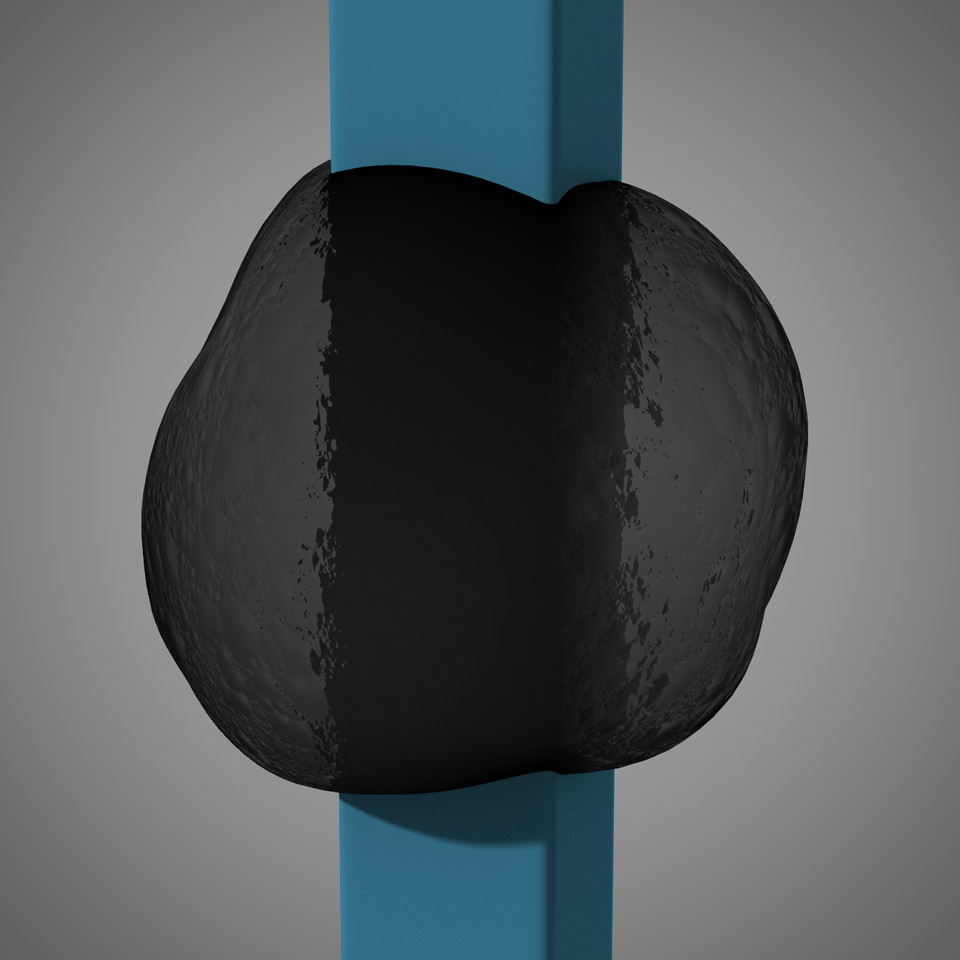
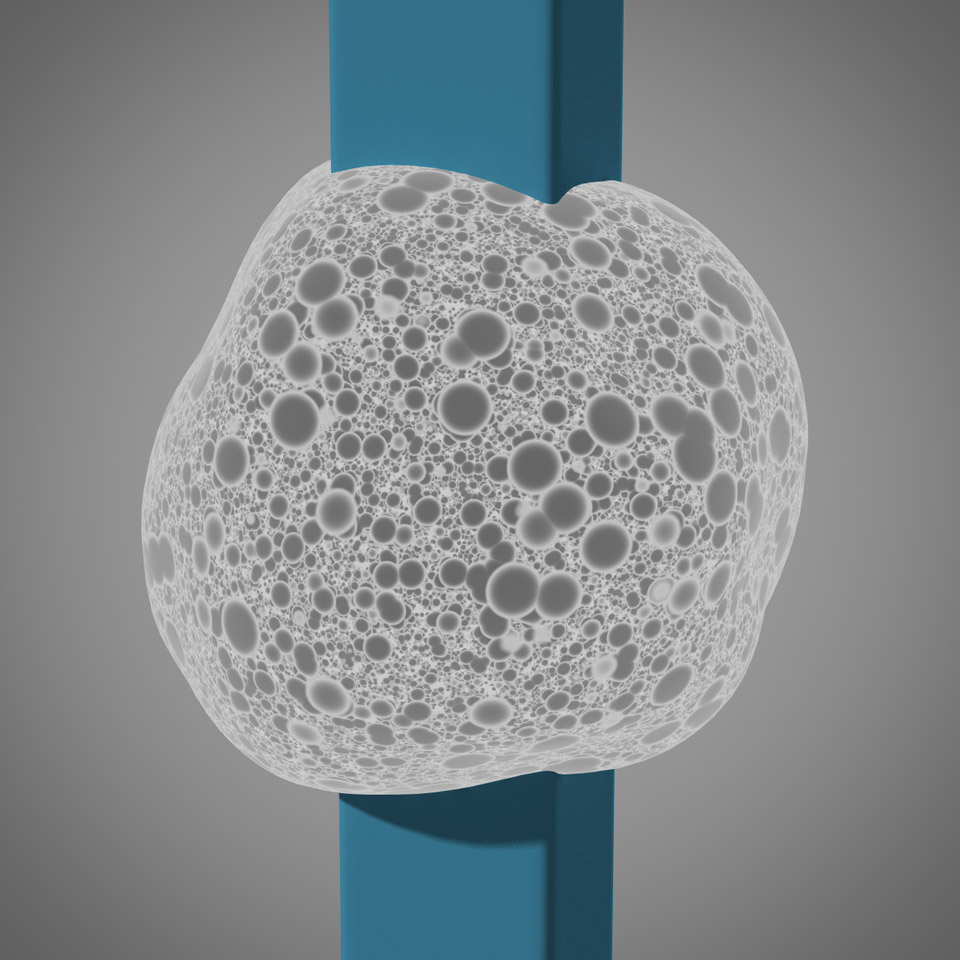
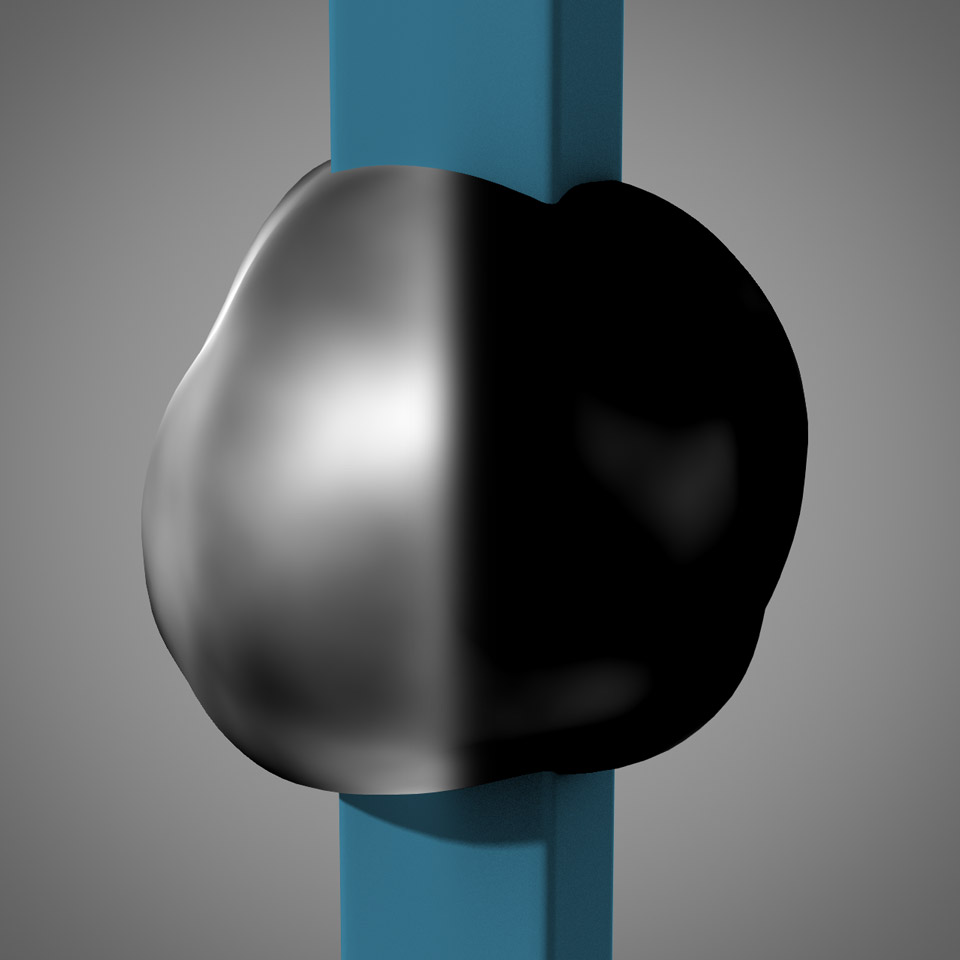 Starting with a subdivided sphere and a simple Turbulence node fed into displacement (use subtractive blending to easily get negative values), I began to build up layers of bubbles using successively smaller copies of the Crust node. Many procedural textures in Lightwave use consistent noise patterns that repeat at multiples of two. Unfortunately this didn’t really work out when it came time to overlay the Crust patterns, but halving the scale in each iteration still gave me the levels of detail I was looking for.

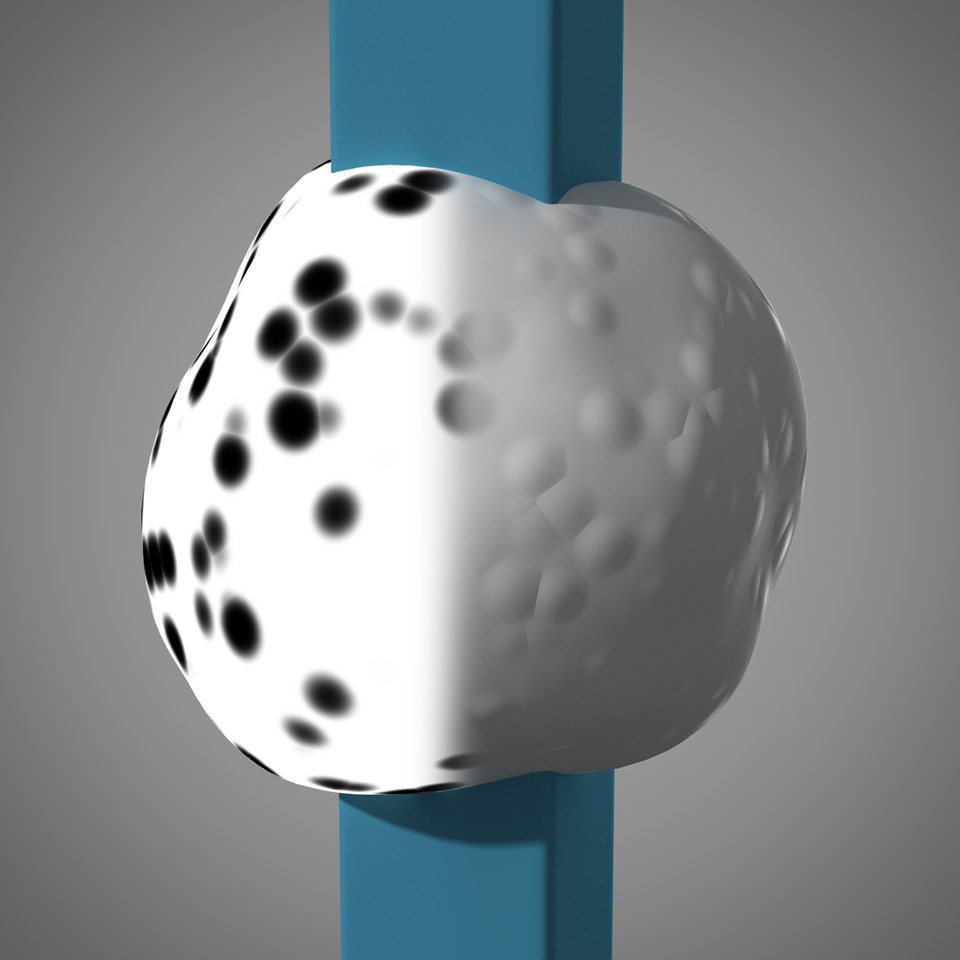 By feeding the output of each node into a SmoothStep node for contrast, and then piping it into the opacity of the next node, I was able to make sure no bubbles added to each other, instead creating sharp rings around each shape. They of course overlap quite a bit, as random patterns will, but always remain independent of each other.


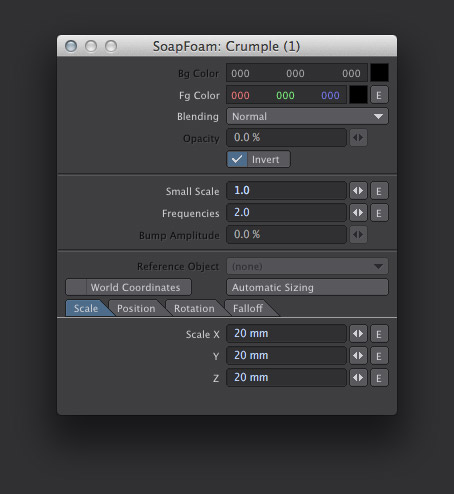

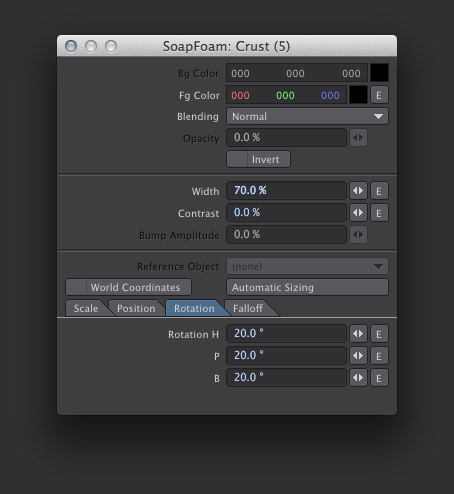 If this surface will be applied to any flat surfaces, it’s important to rotate the Crust node, or odd patterns will start to emerge. I added a simple 20°,20°,20° rotational values to each node to prevent the patterns from easily appearing in most situations. You can further prevent this by rotating each node randomly.
The bump of each node was controlled similarly to the opacity, but with a gradual reduction in amplitude using scaler Multiply nodes. We want the larger bubbles to be significantly more dramatic than the smaller bubbles, eventually fading into a subtler pattern.
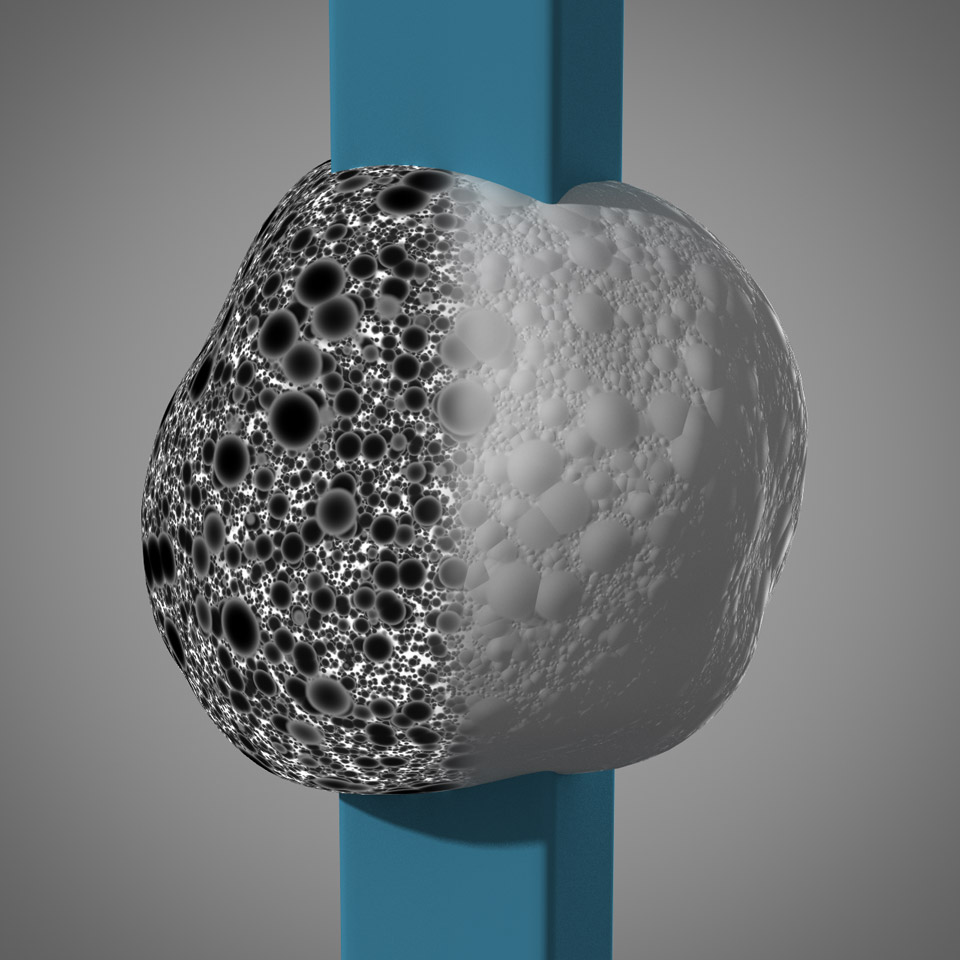
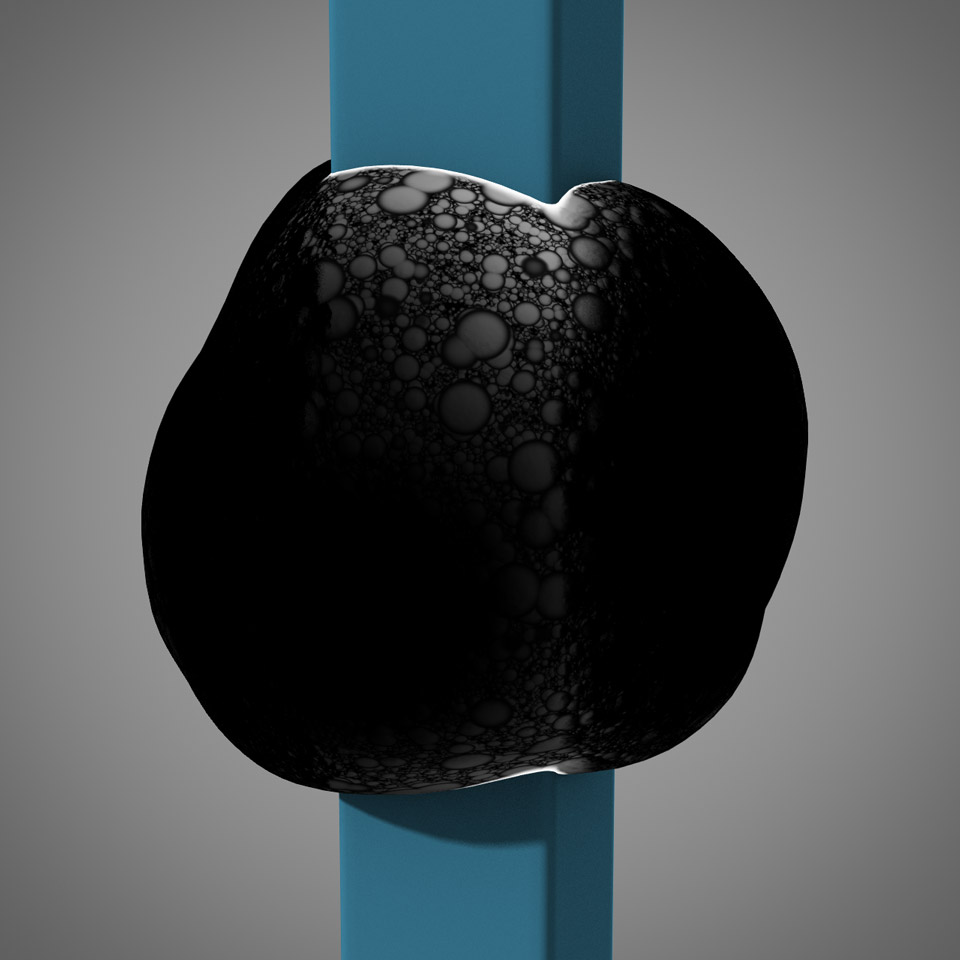
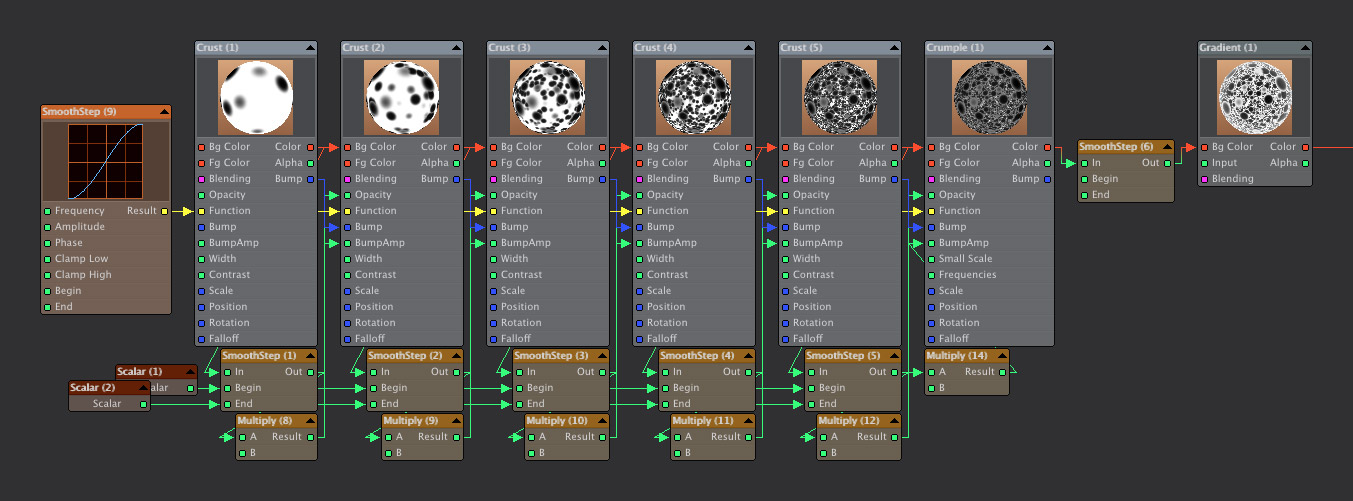 Using a SmoothStep function node helps smooth any sharp points at the pinnacle of Crust spots. We won’t notice this in the colour channel, but it makes a difference when we start cranking up the surface normals. Once 5 layers of Crust nodes were all connected, I added a final Crumple node to fill in any remaining gaps. Because I’ve been working from white to black, the Crumple procedural was inverted to match the dark spots of the Crust nodes.
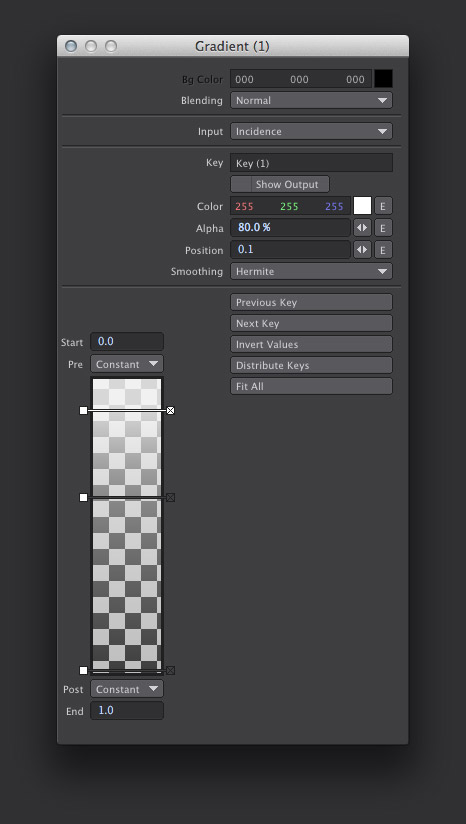
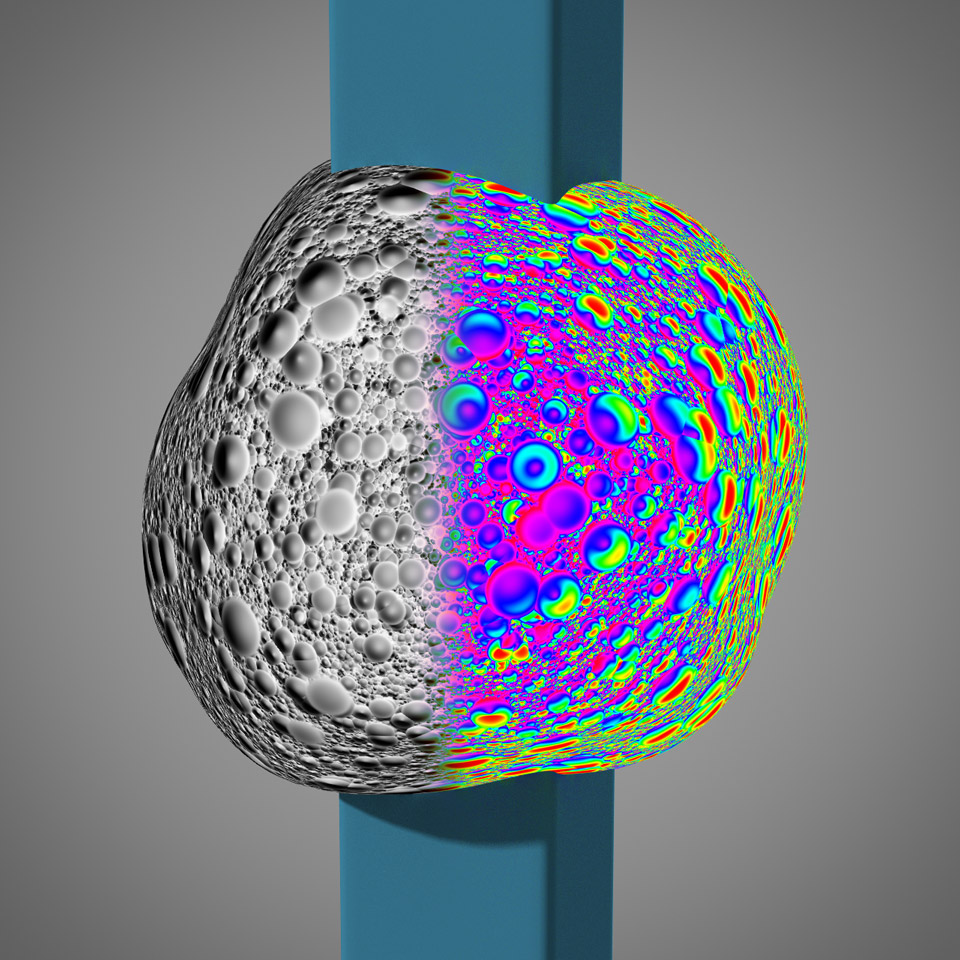
 Lastly, I increased the contrast of the resulting texture by cropping the values with a SmoothStep node, and added a Gradient set to Incidence. We’ll use both textures (with and without incidence shading) to drive various parts of the surface. Using alpha to composite the white value over the texture input, instead of solid grey scale values and a blending mode, provides us with a clean, untextured incidence channel via the Gradient node’s alpha output; perfect for diffuse and reflection shading later on.
Multi-normal surfacing
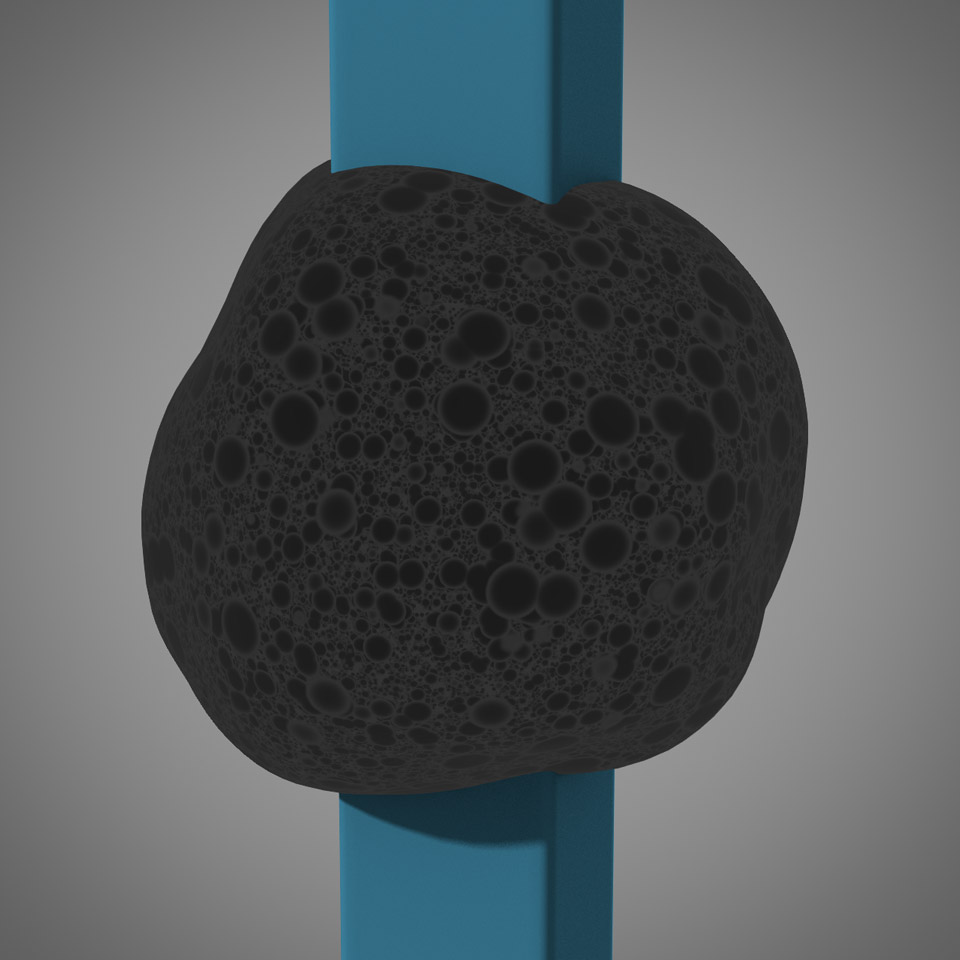
Now things start to get fun. Using the BumpNormal node from Denis Pontonnier’s excellent DPkit node collection (an astonishingly free download from his website), we’ll convert the texture bump into usable normal maps. These will be used to control separate specular shaders, creating the depth needed to simulate dimensional bubbles on a flat surface.
Connecting the bump values via Scale nodes allows us to overdrive the strength, or invert the values to create concave surfaces.
When you create a soap bubble, or just check out some images online, you’ll see distinctive outer and inner reflections. To create the convex outer shape of each bubble, we’ll take the bump output from our texture stack and crank up the strength using a vector Scale node. Pipe this through a Bump Normal node, and it’s ready to plug into any shader (diffuse, specular, reflection, or otherwise).


To create the inner or back-side reflection, we’ll need to invert those exact same normals to form concave surfaces. This is just as easy – simply use a negative Scale value.
Specular highlights
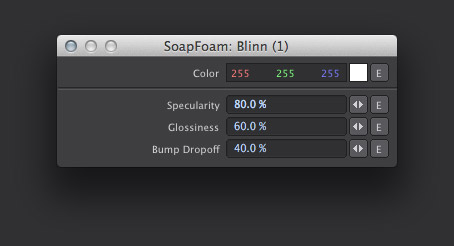


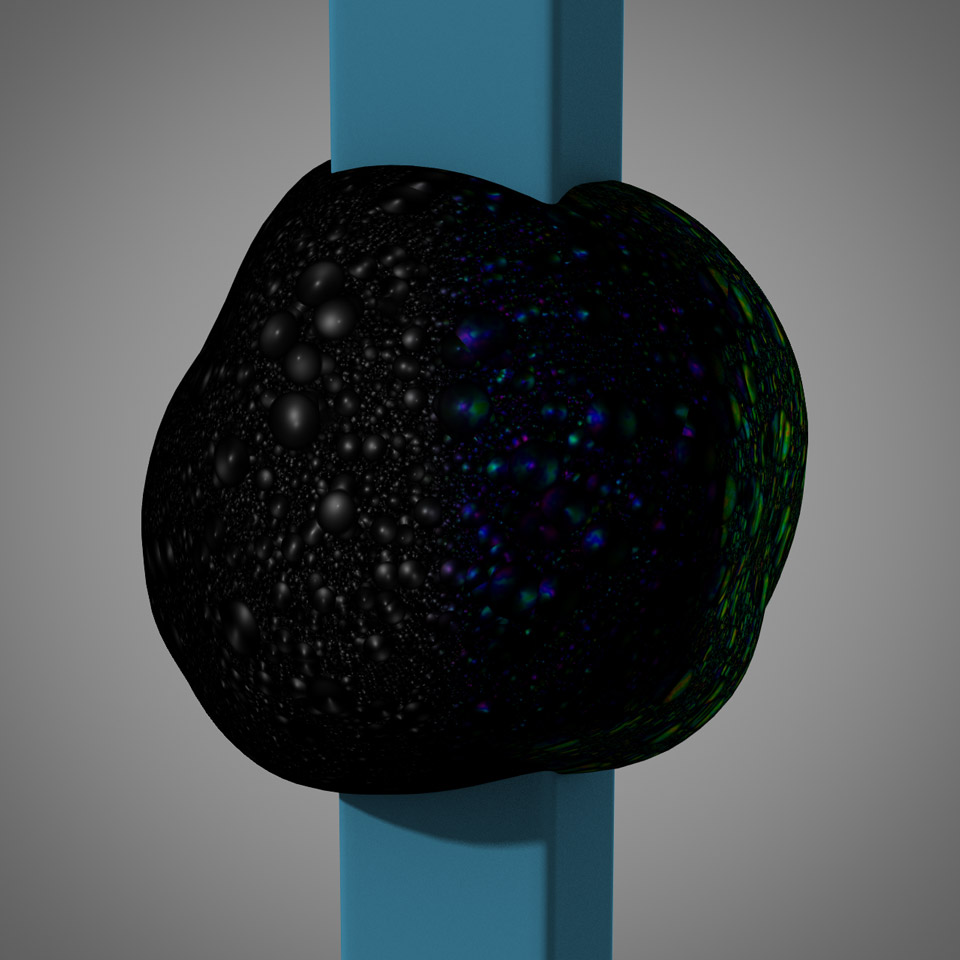
Now lets check out the normals by adding two Blinn shader nodes, and connecting the normal and inverted normal values to each. One will control our front-side reflections (the convex bubble), and one will contribute our back-side reflections (the concave interior of the bubble). By reducing the specular value of the interior, and then adding them together, we should have a nice approximation of a surface covered with bubbles.
Thin-film interference
However, this really doesn’t look particularly soapy yet! Thin-film interference is a crucial part of nailing the look of any kind of bubble or film-like surface, and while it would possible to get very technical and accurately simulate reflectance hue based on surface thickness and wavelength cancellation, it’s usually only necessary to emulate the feeling.
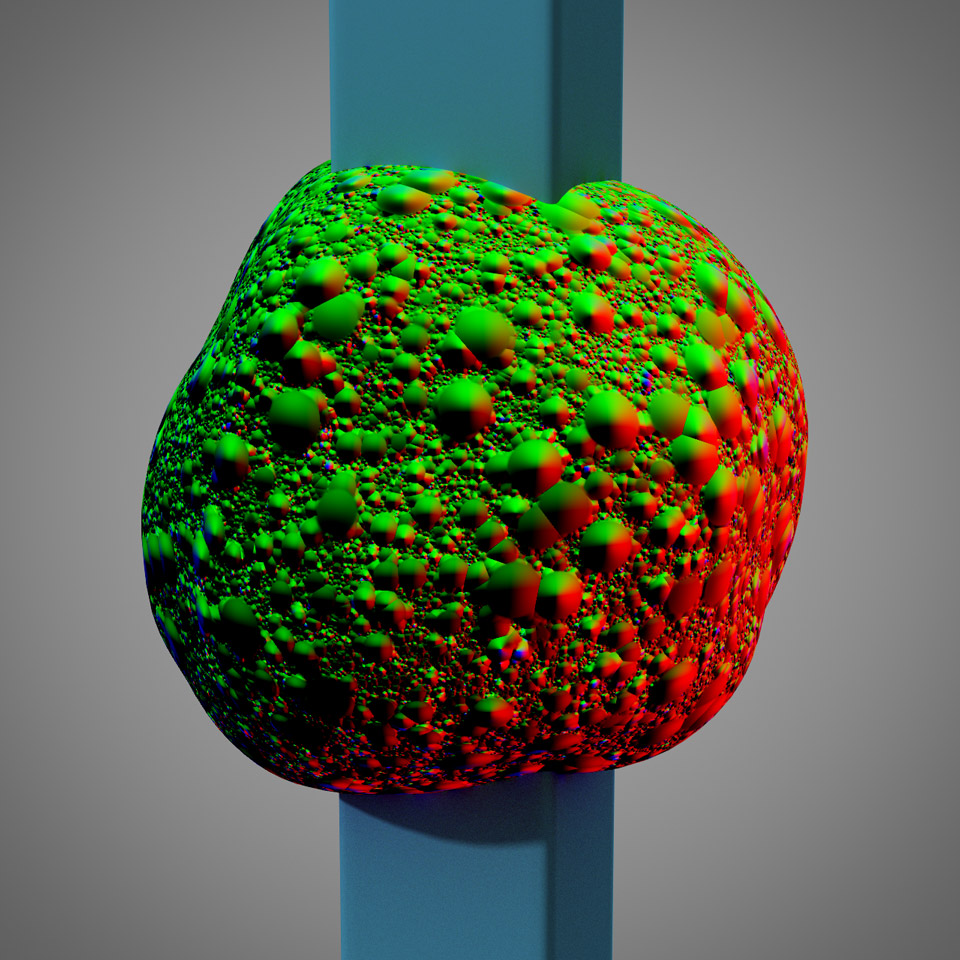
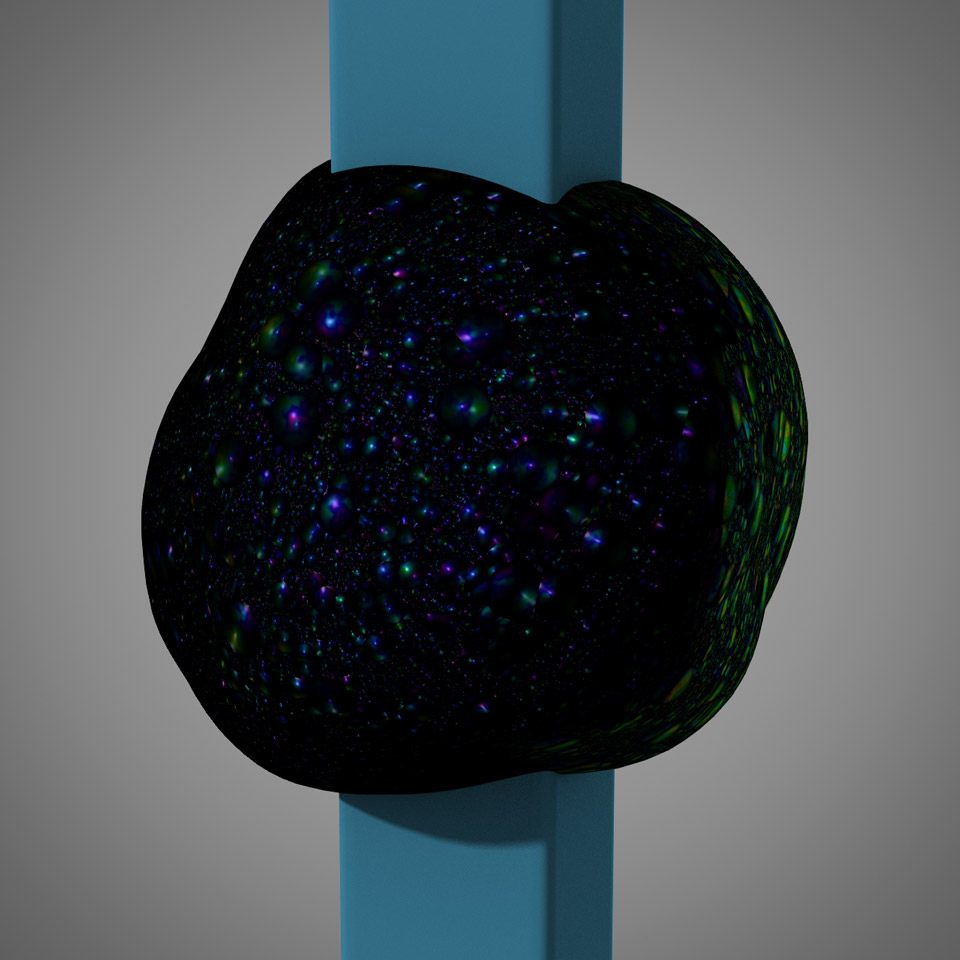
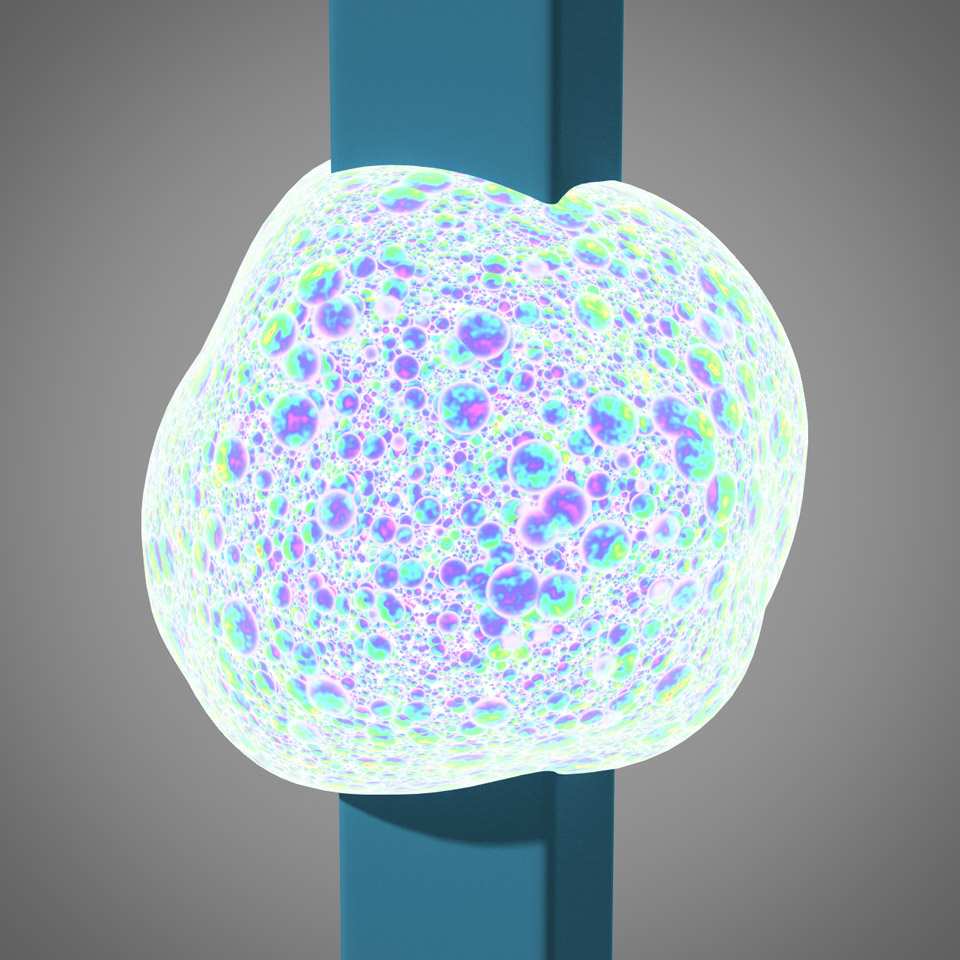
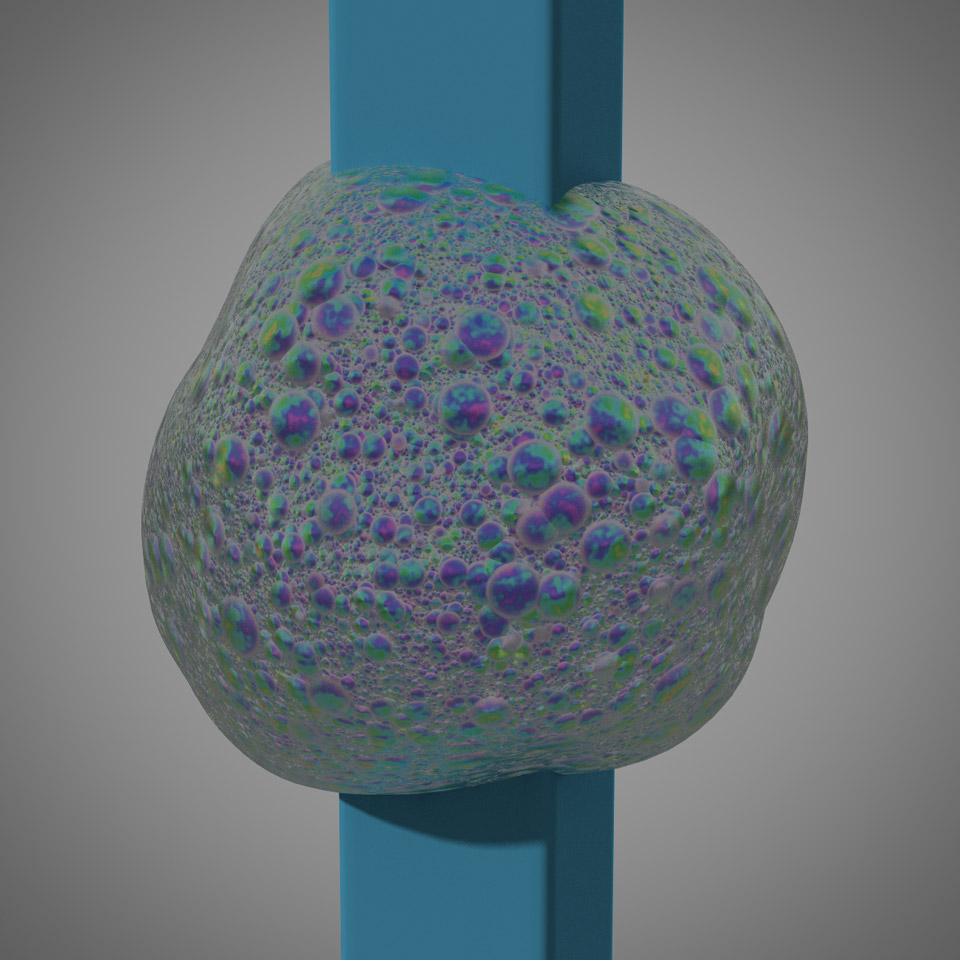
 Create a Gradient node, and add keys for each major colour you want represented. I used the basic RGB combinations as a starting point, but you can make it as realistic or wild as you want. If you pipe the bubble texture output into the Gradient node Input, you’ll see some sort of rainbow-hued rings. It needs a bit of tweaking.

 We’ll do this by combining multiple texture sources. By using the forward normals used in the specular highlights, we can derive bubble surface angle by piping it into an Incidence node. Combining this with the plain bubble texture gives us a nice start, however, this is still far too regular. We don’t want smooth concentric rings like in an oil-covered water puddle, we want more turbulent swirls of colour!
Add a Turbulence node with only a couple frequencies to get softer noise patterns, and mix this with the incidence and texture values. It’s easiest to use Mixer nodes to do this, as we have a simple Opacity control, but you could also use a series of scaler math nodes as well; they may render a little faster. Change the mixture to find the right balance between smooth and turbulent colour distortions, I used 75%, which let the incidence influence things a little (you’ll notice the sides tend more toward green), while also covering the surface with dramatic swirls of colour.

 While you can plug this gradient output into the Colour input of the Blinn shaders already there, I much prefer the stylised look of additional Phong shaders. The light falloff is much broader and more diffused, which lets us paint with light much more easily, and that’s exactly how I wanted to add the interference patterns.

 Copying the Gradient node and using an inverted Turbulence input for the mix provides an alternative colour for the backside of each bubble. Connecting the Phong shaders in the same way we connected the Blinn shaders, we’ll use forward and backward normals, and then use an inverted bubble texture in the Specular input to make sure the rainbow colours only appear within the clearest parts of the larger bubbles. Use a math node to darken this for the second Phong shader (the one using the inverted normals), and you should start to see things pull together nicely.
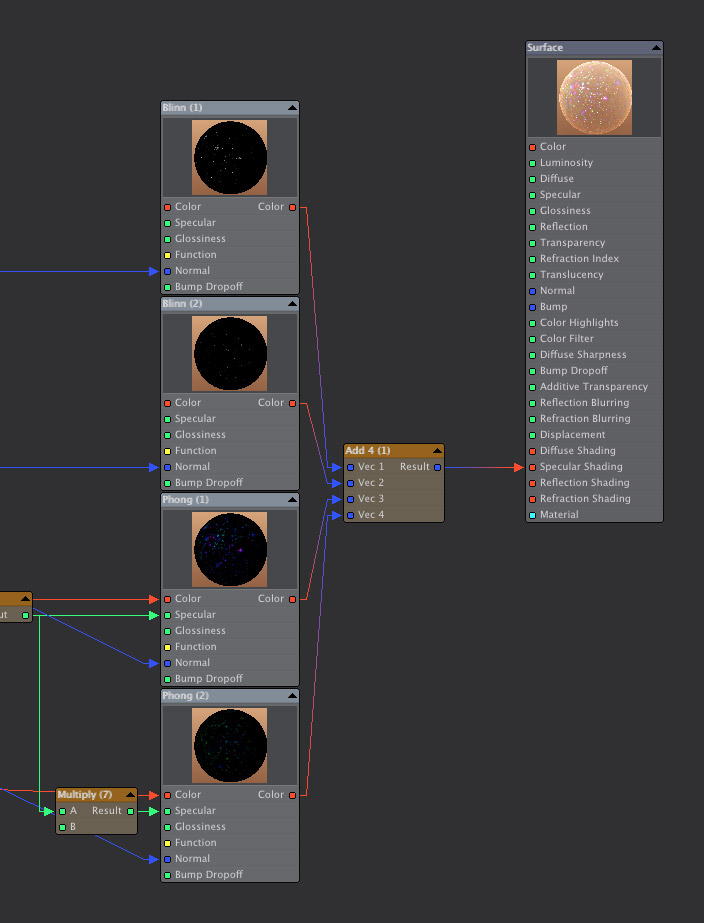


Since Vector and Colour value types are essentially the same (just three values each), we can use the vector Add 4 node to combine all of our specular shaders and pipe them straight to the Specular Shading surface input.
 And lastly, I added a third Scale and Bump Normal set up in order to incorporate the results of the original bubble texture bump along with the bump from the Turbulence node used to distort the colour gradients. We’ll use this to add just a little more variance to a few of the upcoming shader nodes.
Thickness node
The example Milivoj Popovic posted in his forum thread used raytraced geometry thickness to compute a sudo-volumetric falloff. I liked the idea, and combined it with the texture to make sure we could see through the centres of the larger bubbles more easily, while the foam boundaries were made more liquid and clear. This does have the disadvantage of causing artefacts at boundaries within shadow areas. Tweaking or adjusting will be required, depending on how you intend to use the shader and in what kind of scene setup.
 Lightwave’s Thickness node will trace rays in the same direction as the camera angle, returning the distance traveled from when they started at the surface location to when they hit any other surface. This works with both front and back facing geometry, and even includes index of refraction controls. The output is the actual measurement; a 1.0 scalar value is equivalent to 1m distance traveled. We can use this to very carefully manage how deeply we can see through our foam.

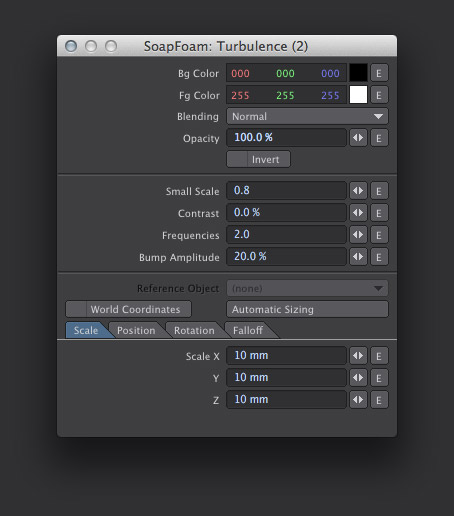
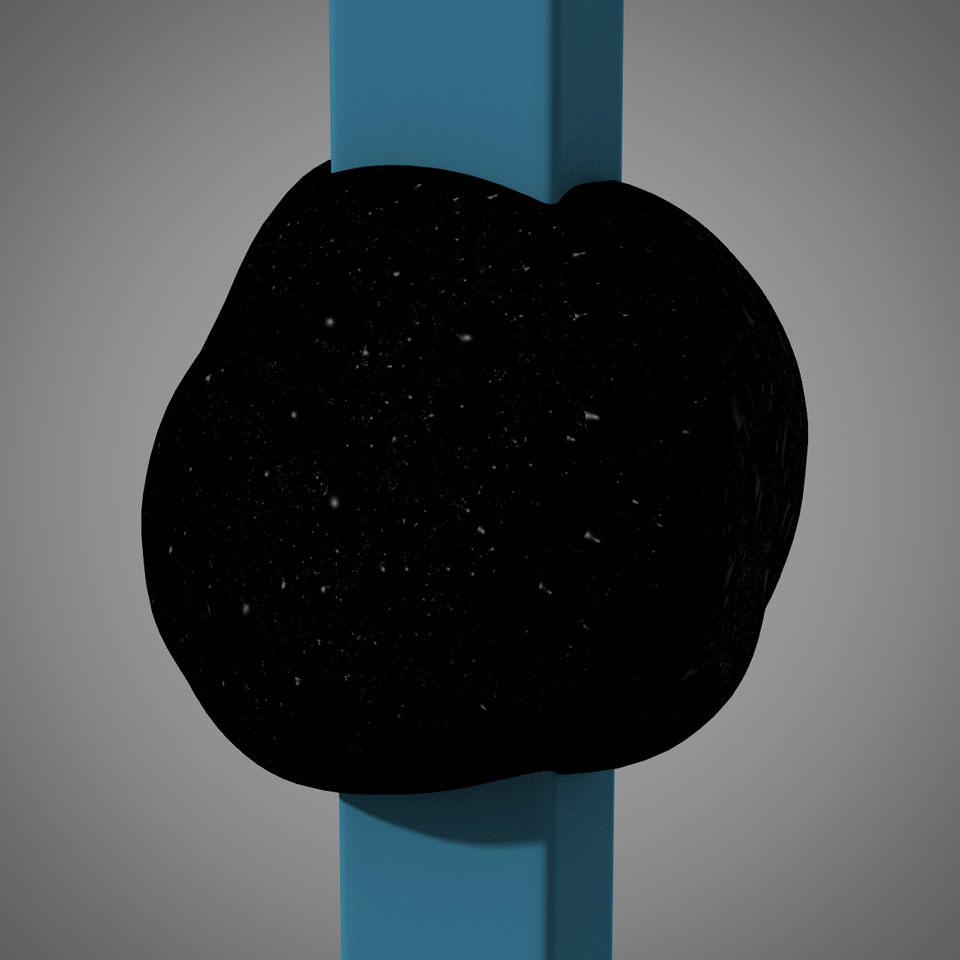
 However, we don’t want to just see straight through the surface, it needs to have a lot more variance, and the realism of how a liquid, even liquid that’s mostly air bubbles, refracts and distorts light. We’ll take the third Bump Normal output (the one with the additional Turbulence and inverted normals), and and use it as the Thickness node’s Normal input. This is a good start, but unfortunately the Thickness node has no setting for diffusion or blur. To fake this, let’s add a Turbulence texture node set to an exceptionally small value (I used 100um), both colour values set to full white, the blending mode set to Additive, and the Opacity set to around 40%. This gives us values between 1.0 and 1.4 in a super fine noise pattern that’s perfect for tweaking the IOR (Index of Refraction) input of our Thickness node! It’s not perfect, but it’s a good, fast solution.
 We’ll implement SmoothStep nodes to define two distance regions; the immediate edge (Begin at 0.0 and End at 0.01), and the broader visual falloff (Begin at 0.0 and End at 0.1). Since the scaler values all correspond to real-world measurements, the visual falloff values mean the surface will only start to become transparent at depths less than 100mm.
 Add a Pow node set to 1.5 to control edge rolloff, and Multiply the first Smooth Step node with our first Gradient texture (with the bubble texture and incidence). Using a Mixer, we’ll combine this with the broader visual falloff value using the Screen blending mode. Unlike Additive, which is far too overpowering, and unlike Max, which is far too harsh, Screen will combine values in an additive-like way, without ever going over 1.0. This can be replicated using scaler math nodes, but it’s usually easier to just use the mixer, albeit often slower to render.

 Invert the results, and connect the output to the Surface Transparency input. Perfect! We now have transparency that’s based on both the object incidence, individual bubble density and edges, and distance to the underlying geometry. It’s probably as close as Lightwave can get to a volumetric material.
Subsurface scattering
Subsurface scattering in Lightwave has been gradually improving for years, and now we have a great system of moderately accurate, fairly fast, and exceptionally smooth shaders to employ. Either the SSS or SSS2 nodes can be used; the latter allows us to colour backscattering separately, meaning back-lit areas can introduce a secondary colour. Useful for more highly stylised foam, or just to tweak the feel a little.
 As bubbles seek spherical form through equalised pressure, they will both extrude away from the surface, and intrude into the depth of the foam. Larger bubbles may look slightly darker due to this, as opposed to areas of fine bubbles, which scatter the light more immediately. To simulate this look, we’ll modulate the depth of the SSS scattering based on the bubble texture, while using a couple math nodes to reduce the texture distance to just 100mm (Multiply node set to 0.1), and then set the base distance to 100mm as well (Add node set to 0.1). This means our surface will scatter light anywhere between 100mm to 200mm in distance, all based on the bubble texture. We’ll use the third Bump Normal output to further modulate the surface, ever so subtly, add simulate the finely diffused lighting of bubbles beneath the larger bubbles visible on the surface.


 Like any diffuse+reflection surface setup, we’ll adjust the brightness of the SSS node by piping the alpha of our original Gradient. Remember, the incidence shading was set up using Alpha, so to get only the incidence of the object, instead of the texture as well, that’s what we want to use here. We’ll adjust it as needed using a scaler Multiple node, then invert it for the correct diffuse shading (higher angles of incidence, that is, towards the sides of the object, should reflect more and diffuse less). The non-inverted input should be connected to the Reflection input of the Surface.
It’s certainly not as physically accurate as an energy conserving shading model, but it’s close enough to work. Though we could use the Incidence node output (driven by the normals of the individual bubbles) instead of the original Gradient (which is using only the geometry normals), I wanted to shade the object as a whole, not the individual bubbles in this case. Play around and decide which you prefer.
Reflections and refractions
It’s important to note that we’ve been designing this surface for use with regular lights, not luminous geometry. Specular, reflection, and diffuse shaders are all simulating different parts of the same continuum; bouncing of light. So far we’ve created the sharp highlights of direct reflection using Blinn and Phong shaders, and the wildly diffused reflection of a volumetric surface with the SSS shader. However, leaving it at that will also leave our surface a little flat and lifeless when placed in a scene. To add a bit more scene integration, not to mention some Fresnel action, we’ll be using Reflections and Refractions nodes.
 Mix a new colour output by mixing the first rainbow Gradient and a white value, controlling the Mixer node Opacity input with the inverted texture used to mask off the Phong shader as well. This lets us influence the bubble reflectivity hue, while leaving areas of fine foam and edges completely desaturated. The same can be done for the Refractions node, but I chose not too as I felt it could get a little to overpowering with too much colour.
 Use the first normal output for our Reflections normal input, that way the environment will reflect from the apparent outside of the surface. With the inside already simulated with specular highlights, we won’t bother adding a secondary reflection node – it’d probably slow things down far more than it would contribute to the final look. We’ll also use our first Gradient output (with the texture and incidence alpha), along with a couple scaler math nodes, to modulate the Blur input. This is important because we don’t want a sharply reflective surface (which could make it look like the foam was shellacked on the outside), but instead simulate the diffuse reflection of a billion tiny bubbles. You can adjust the amount of difference between small bubbles and large bubbles by changing the Multiply and Add nodes to suit. You might find it works better for your scene with sharp reflections in the larger bubble areas.

 We’ll do essentially the opposite with the Refractions node. Since the larger visible air bubbles would distort hardly anything, we want to use the inverted normals for the Normal input. This should make it look like the liquid surface below the larger bubbles is comprised of slightly more liquid than air, and we’ll use stronger blur values to obscure anything below the surface. This helps simulate a more volumetric material, and obscures details where fine bubbles would realistically diffuse everything.
Dispersion can be added to the Refractions or Reflections shaders as well, but in my experience it contributes far more to slow render times than it does to surface quality. Because we’ve already added a lot of colour via the phong shading, and the reflections and refractions are already quite blurry, the viewer would most likely never notice chromatic aberration effects anyway.
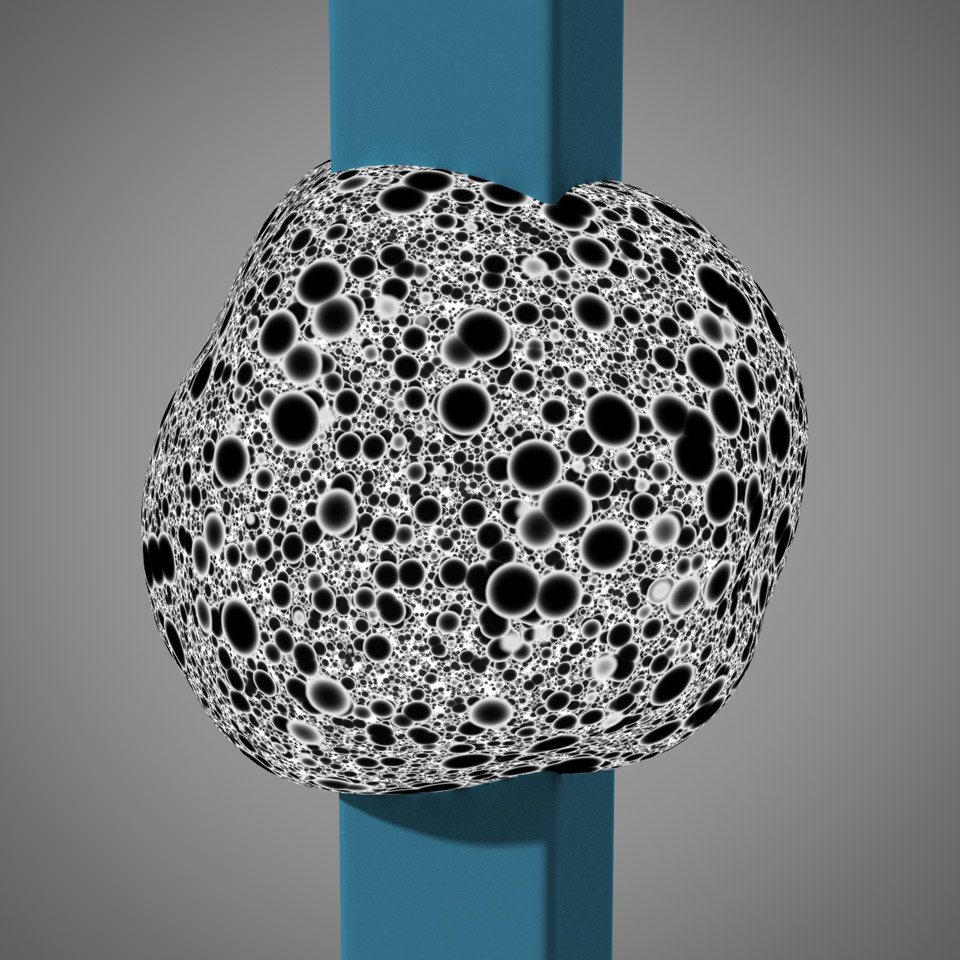
Render
 The surface is pretty much done, and is ready to be tweaked till it’s just right. I’m sure with a bit of experimentation, you’ll find ways to streamline and improve the look. If your shot doesn’t need all the levels of details (especially if they prove troublesome for anti-aliasing), it’s easy enough to remove a couple Crust nodes. Playing around with custom functions and the Crumple node could even result in more realistic bubble boundaries, instead of hacking together a few Crust textures. The possibilities are, as always, entirely endless!
You can also develop a more physically accurate model by replacing the specular highlights entirely with reflection nodes. It may be slower, but should work fantastically well in scenes lit entirely by luminous geometry and radiosity.
Downloads
This is a free download, however; I’d appreciate attribution if it’s used in a project. Thanks!
Newtek and Lightwave 3D are either registered trademarks or trademarks of Newtek Incorporated in the United States and/or other countries.
Adobe, Photoshop, and After Effects are either registered trademarks or trademarks of Adobe Systems Incorporated in the United States and/or other countries.
 mediaboxAdvanced