Rotational Displacement
iaian7 » tutorials » lightwave John Einselen, 18.05.07 (updated 10.04.11)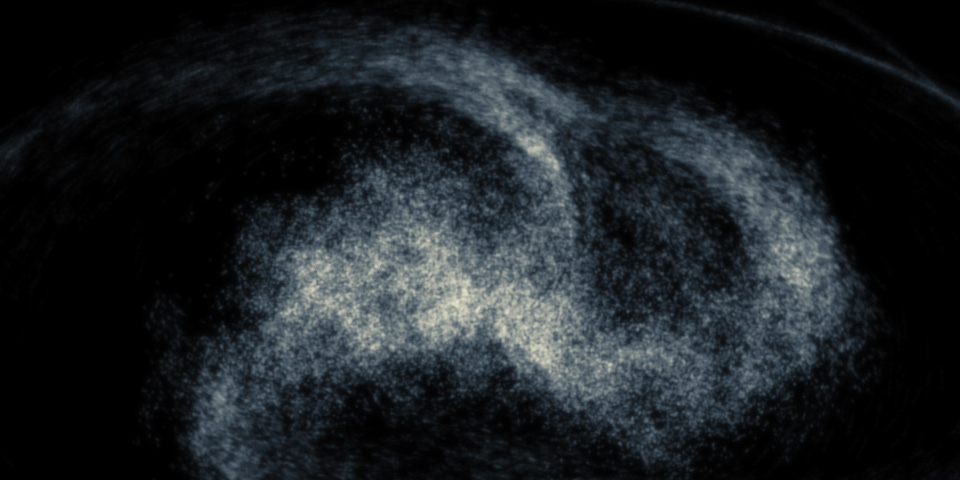
Lightwave includes some vortex style distortions for objects, but unfortunately it’s a clumsy setup and difficult to use with other displacements. With the advent of nodal displacement in Lightwave, we’re able to set up mathematical equations like the ones needed to rotate a field of points around an axis, among other 2D transformations (the equations below are taken from this site, along with help from Tim Lovett). Be forewarned that the end result is admittedly a little slow and the node tree can be a bit unwieldy, but the precise control and versatility can be worth it.
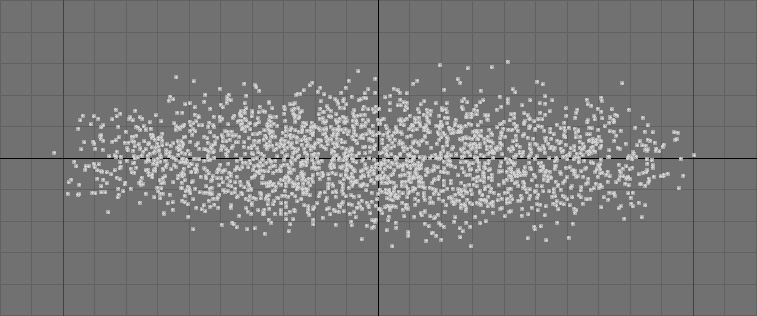
We’ll start with a single point polygon cloud made in Modeler, scaled along the X axis so any rotations are easily seen. (click on any image to open up the full version)
This will render pretty quick using the classic camera in Lightwave 9.0, even with full shadows and multiple lights (ray traced and shadow mapped). It makes for a quick and semi-volumetric cloud of dust, water spray, or other effects. Tornados come to mind, among other particle based effects that require a certain level of control.
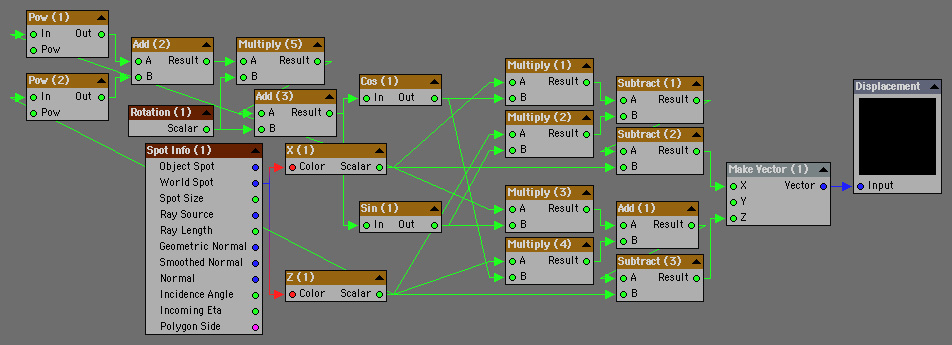
Rotational Trigonometry
X2 = X1cosB - Z1sinB
Z2 = X1sinB + Z1cosB
Where X1 and Z1 are your original positions, X2 and Z2 are the end positions (after rotation) and B is the amount of rotation. Since this is a displacement effect, not location, X3 and Z3 are the final values needed for Lightwave to use it.
X3 = X2 - X1
Z3 = Z2 - Z1


Exponential rotation
Since rotating something is hardly worth the trouble, here’s where it gets fun; square the point position, and modify the rotational value based on the distance from the center of rotation. It can quickly get out of hand, so we’ll include some scale factors to rein it in.

Rotational centering
So far we have assumed a starting point of X and Z = 0. It probably isn’t in most practical cases, so we’ll want some way of controlling the center of our displacement. The easiest option is to pick a null object with an Item Info node, and subtract it’s position from our X and Z values before any of the other calculations.


Variations
So far we have a great vortex-style displacement. Not the most organic, but it’s certainly usable.
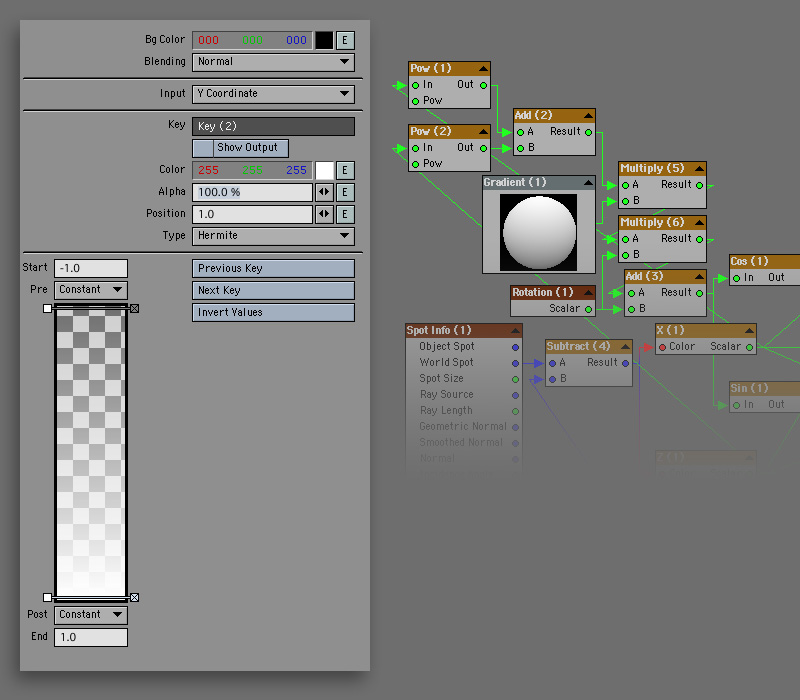
We can modify the spiral by multiplying the rotational value with a texture. Procedural turbulence can create patches that rotate faster than others, or by using scalar nodes to input a negative Bg colour and a positive Fg colour, we can get patches that rotate opposite each other (delineation between the patches is easily changed with the contrast settings). Using a gradient you can map rotations to the height of the object, or other values. The options are, like most nodal operations, practically limitless.

The center point can also be displaced, adding layers and randomness to the arcs created. Keep in mind red = X, green = Y, and blue = Z, and the texture should be set to Additive or Subtractive to modify the input position instead of replacing it. Any simple texture will work, but can only displace in a straight line (angled by the additive position of the three colours, but a straight line nonetheless). In some cases this works fine, but you can also use multiple textures to drive the center point in a more organic fashion.


Downloads
Read more about nodes on the Newtek website or the online collection of Lightwave tutorials.
That a renamed nodal function
Tools > color_scalar
 mediaboxAdvanced
I don’t understand X1, X2, etc. Where do i get these variables. There weren’t available derectly in the noded panel. Are they something that you download or are the nodes that have been renamed. Do i have to add any nulls?